This post may contain affiliate links. Please read our disclosure policy.

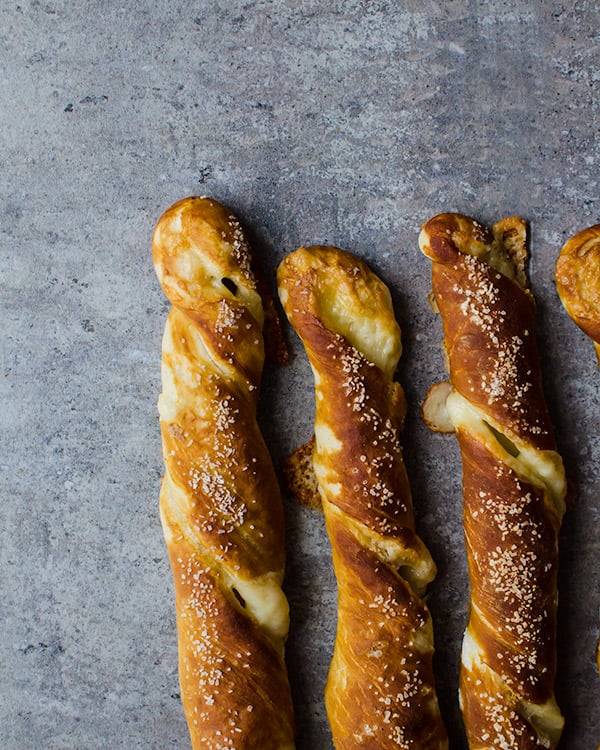
I love pretzels. They are probably the most perfect carb on this beautiful planet. When you add some delicious cheesy goodness to it and twist it all up, it is game over. I am talking, you will need to hide them somewhere outside of the house because I will hunt them down and I will eat them all. I know. Because I ate basically ate an entire batch of cheesy pretzel twists after taking these photos.
A lot of people get nervous when it comes to making breads like pretzels because you need to use yeast. If you have good yeast, it is actually pretty east as long as you follow directions. Yeasted breads (bread with yeast in it) is very, very forgiving and take a lot of beating. Most of the trouble comes when people use old packets of yeast or use water that is too hot. I recommend storing your yeast in the back of the refrigerator as it keeps the yeast fresh for longer. You should also use water that is warm to the touch, but is not hot; it should feel a few degrees above body temperature.
Usually, I prefer to use active dry yeast. This is yeast that has a coating on it and needs to be “proofed” or soaked in the warm water for about five minutes to activate it. For the purposes of keeping the recipe easy and faster to make, I used quick rise yeast. This type of yeast usually does not need to be proofed, meaning you can just stir it right into the flour and water all at once. It also requires a shorter amount of time to rise, making it “quick.”
For the best cheesy experience, I like to use a mix of cheese. I mix and match different cheeses such as cheddar, swiss, havarti, provolone, pepperjack, and whatever else I may have on-hand. Get creative!
Instead of buying pretzel salt, I use kosher salt which works just as well, but if you have any pretzel salt, or plan on making cheesy pretzel twists a lot, you can order it in bulk on Amazon.
INGREDIENTS
- 1 1/2 cups warm water
- 2 tablespoons sugar
- 2 teaspoons quick rise yeast
- 3 tablespoons oil
- 3 3/4 cup all-purpose flour
- 4 teaspoons kosher salt, divided
- 2 cups shredded cheese
- 1/4 cup baking soda
DIRECTIONS
- In a small bowl, mix together the warm water, sugar, and yeast together. Drizzle in the oil.
- In a mixer, add the flour and 1 1/2 teaspoons of the salt.
- Pour in the yeast mixture and stir until the mixture comes together to form a dough.
- Knead for about 8 – 10 minutes.
- Lightly grease a bowl and add the dough. Cover and leave in a warm, dry area, such as an oven with the light turned on. Allow to rise for about 30 – 45 minutes, or until doubled in size.
- Divide into about 10 balls and leave on a greased baking sheet and cover. Allow to rise for about 20 minutes.
- Preheat the oven to 400 degrees F.
- Lightly flour a surface and use two hands to roll out one ball to form a short log. Take a floured rolling pin and use that to flatten and lengthen the dough so that it looks like a wide ribbon. Do not roll out too thin or else it will be too difficult to handle.
- Sprinkle a generous amount of cheese onto the dough, then fold the dough in half, gently pressing the seams.
- Twist the folded dough and leave on a greased baking sheet. Repeat with the remaining balls of dough and cheese.
- Boil a cup of water and carefully add the baking soda. It will bubble up a lot at first, so take extra precautions.
- Use a pastry brush to generously coat the pretzel twists with the baking soda mixture.
- Sprinkle the tops of the pretzels with the remaining kosher salt and any leftover cheese.
- Bake for about 15 – 20 minutes, or until a deep golden brown.
- Pretzels are best the same day, but you can also store in an airtight container for about a week. I recommend eating them warmed up in the microwave for about 10 seconds.
