This post may contain affiliate links. Please read our disclosure policy.
I’ve been a little nostalgic lately since it’s back-to-school time. August is one of those months that brings back all kinds of memories, memories as both a student, and as a teacher. It’s one of my favorite times of year for all of the new beginnings it brings! It also tells me that fall is right around the corner, which happens to be one of my favorite seasons of the year. I heart pumpkins, and sweaters, and hoodies, and colorful leaves, and football, and pretty much everything about fall!
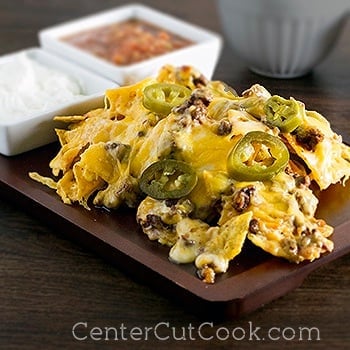
So what do Cheesy Macho Nachos have to do with back-to-school, you ask? Ryan and I got married YOUNG! He was almost 19 and I was barely 20. Shortly after we got married we moved to Iowa so that he could start school at Iowa State University in Ames (go Cyclones!), and I could finish my last two years there. As college students, we had the typical college student diet consisting of frozen pizzas, more frozen pizzas, macaroni and cheese, and hot dogs. I remember how excited we’d get when HyVee, the local grocery store, put Tony’s or Tombstone pizzas on sale for 5 for $10. Talk about a steal (I’m sort of nauseated at the moment thinking about how much frozen pizza we consumed back then)!
A typical night of studying usually included a frozen pizza or mac n’ cheese, sometimes both (ick!) and then later into the wee hours of the morning we’d make a huge plate of nachos to get us through the last homework assignment or test preparations. I’d throw a bunch of shredded cheese on some tortilla chips, zap it in the microwave for a few minutes and call it good. Now, anytime I make a plate of nachos I am immediately brought back to our cute little apartment where I envision books and papers all over, along with a gooey plate of nachos.
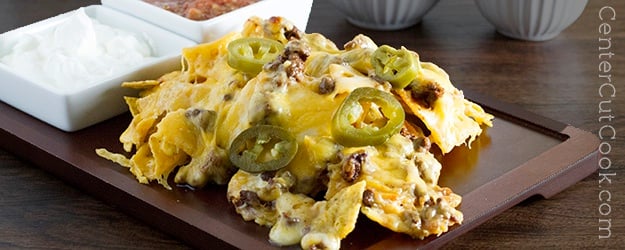
These nachos are an ‘upgraded’ version of what I used to make. The main difference is the addition of some spiced up (although not ‘hot’ spicy) ground beef (hence the ‘macho’ part of the title), but I also tweaked with the cheese. Did you know that pre-shredded cheese has a chemical added to it so that it doesn’t clump in the bag? The chemical that is added is the reason that pre-shredded cheese does not melt as well as cheese that you shred on your own. Anytime you’re making something where you want the cheese to be ooey gooey and melted, definitely shred your own which is my recommendation for these nachos. You can use any cheeses you’d like, but I used a combo of sharp cheddar cheese with some american cheese. For the American Cheese, I bought a chunk at the deli counter at my grocery store, and shredded it myself.
This recipe calls for a 9×13 inch pan, but you could easily cut it in half and use something like an 8×8 pan to make a smaller portion. These definitely must be eaten fresh, so don’t count on eating leftovers – we did, and I don’t recommend it! Fresh is definitely best.
INGREDIENTS
- 2 teaspoons oil
- 1 small yellow onion, diced
- 1/2 pound ground beef
- 1 tablespoon ancho chili powder (regular chili powder is fine if you don’t have the ancho variety)
- 1/2 teaspoon cumin
- 1/4 teaspoon cayenne pepper
- 1/4 teaspoon salt
- 1 bag (about 12 ounces) corn tortilla chips
- 4 cups cheese of your choice (I used two cups White Vermont Sharp Cheddar and two cups Yellow American Cheese from the deli)
- Sour Cream
- Salsa
- Pickled jalapeños
DIRECTIONS
- Pre-heat your oven to 400 degrees.
- In a large skillet heat oil over medium heat. Sauté the onion until translucent.
- Turn the heat up to medium-high and add the ground beef to the pan. Use a large spoon or other utensil to break the meat up. Add in cumin, cayenne pepper, chili powder, and salt. Cook until the ground beef is cooked through, then drain off any excess fat.
- In a large 9×13 inch casserole dish, spread out half the chips. Spoon half of the meat on the chips, and half of the cheese. Repeat with the remaining chips, meat, and cheese.
- Place in the oven for 10-12 minutes, or until all of the cheese is melted.
- Serve with salsa, sour cream, pickled jalapeños, and any other toppings you’d like.
Recipe adapted from
America’s Test Kitchen
