This post may contain affiliate links. Please read our disclosure policy.

When it comes to pie, I haven’t met a flavor I didn’t like. I definitely have my favorites though, like French Silk Pie! Years ago whenever I’d go to Baker’s Square, without hesitation, I would order a slice of French Silk Pie. There’s something that draws me in with the silky smooth decadent chocolate filling, and the fresh whipped cream with chocolate shavings. For years I had wanted to try making French Silk Pie at home, but I was always really hesitant about the fact that most recipes call for raw eggs. I don’t know about you, but raw eggs make me nervous!

Enter Davidson’s Safest Choice Pasteurized Eggs. You know what pasteurized means, right? The pasteurization process uses heat to destroy bacteria like Salmonella and other viruses which means you can use raw eggs in this French Silk Pie recipe without any worry about getting sick. Lots of dairy products like milk and many cheeses are pasteurized but most eggs that you buy in the grocery store are not. Davidson’s Safest Choice eggs are which gives me peace of mind, especially now that I’m pregnant.
Many grocery stores sell Davidson’s Safest Choice Pasteurized Eggs. Here’s a link to the store locator to find a store near you that sells them.

To make this tasty French Silk Pie, you will start with a pre-baked pie crust. Make your own, or buy one from the store, whatever is easiest for you! While the pie crust is baking and cooling, you will make the filling.
The filling for this French Silk pie could not get any easier! Your mixer will do most of the work for you. It’s simply butter, sugar, chocolate, eggs, and a little salt and vanilla. Just make sure you use a good quality semi-sweet or unsweetened chocolate for this recipe, it really makes a difference! Another key is to pull the eggs out of the fridge, right before you use them. You want the eggs to be cold!

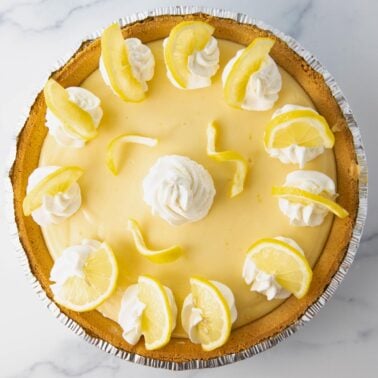
Once you’ve made the filling, you will spread it in the prepared pie crust. At this point you have a few options. You can either top the pie with frozen whipped topping (thawed, of course) OR you can make your own homemade whipped cream which is the route I took. If you want to keep things simple, just spread the whipped topping over the pie. If you want to get a little fancy, pipe the whipped topping on like I did. It is SO easy, yet looks so impressive!
*Note about the homemade whipped topping: I made a “stable” version so that the whipped cream wouldn’t deflate after I piped it on. Instructions on how to do this are below.

Have you ever made chocolate curls before? Like piping whipped cream onto a pie, the chocolate curls definitely provide a “wow” factor and while they look like they could be tricky to make, they are SO easy! All you need is a chocolate bar and a vegetable peeler. Simply run your vegetable peeler length-wise across the chocolate bar and you’ll be left with pretty curls! The harder you press on the chocolate with the vegetable peeler, the thicker the curls will be.

After your French Silk Pie has chilled in the fridge for at least four hours, you will have the ultimate decadent silky smooth dessert ready to share with friends and family. Enjoy!
I am excited to have partnered with Davidson’s Safest Choice Eggs to bring you this post. As always, all opinions are my own. Thank you for supporting the companies and brands that make CenterCutCook Possible!

PIE INGREDIENTS
- 4 ounces good quality unsweetened or semi-sweet baking chocolate
- 1 cup unsalted butter, softened (do NOT use margarine)
- 1 1/2 cups granulated sugar
- 1/4 teaspoon salt
- 2 teaspoons vanilla extract
- 4 Davidson’s Safest Choice pasteurized eggs (make sure they are right out of the fridge, you want them cold)
- 1 baked pie shell (store bought or make your own) – completely cooled
WHIPPED CREAM INGREDIENTS *You can skip this and use frozen whipped topping as an alternative
- 1 1/2 teaspoons unflavored gelatin
- 6 teaspoons cold water
- 1 cup heavy whipping cream
- 1/4 cup confectioners sugar
CHOCOLATE CURL INGREDIENTS
- 4 ounce milk chocolate candy bar – chilled
DIRECTIONS
- Melt 4 ounces good quality unsweetened baking chocolate according to package directions, allow to cool.
- With your mixer, beat 1 cup unsalted butter with 1 and 1/2 cups granulated sugar. Mix until it’s light and fluffy, about 2-3 minutes.
- Add in the cooled chocolate, salt, and vanilla extract. Mix well.
- Add in one egg and mix at medium speed for about 5 minutes. Add in the second egg and continue mixing for another five minutes. Continue this process until all four eggs have been added. It should take about 20 minutes with 5 minutes of mixing per egg.
- Pour the mixture into the prepared pie crust.
- To make the Whipped Cream – in a small pan combine gelatin and cold water and allow it to sit for a few minutes until it thickens. Place the pan on the stove over low heat and stir until the gelatin dissolves. Remove from the heat and allow it to cool but not set. With your mixer or a food processor, whip the heavy cream with confectioners sugar until it starts to thicken. Add in the gelatin mixture and whip until stiff peaks form.You can also use prepared frozen whipped topping (thawed) from the grocery store in place of homemade whipped cream.
- Spread the whipped cream over the pie or pipe it on with a pastry bag. I used the Wilton 1M tip to pipe stars around the pie.
- Make the chocolate curls by using a vegetable peeler to peel off chocolate length-wise from a 4 ounce bar of milk chocolate. Sprinkle the chocolate curls over the pie.
- Chill the pie for at least 4 hours before serving. Store leftovers in the refrigerator Enjoy!
Recipe from
CenterCutCook