This post may contain affiliate links. Please read our disclosure policy.
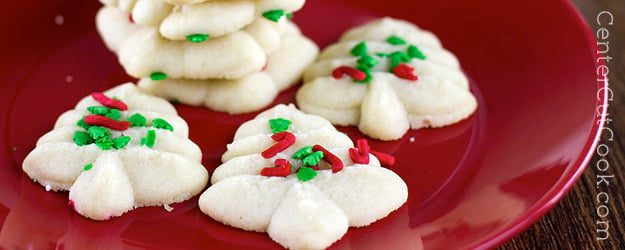
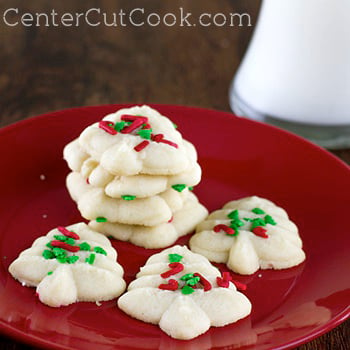
Tis the season for goodies like Christmas Tree shaped cookies, to takeover the cookie jar (or tupperware container, if you’re like me and don’t actually own a cookie jar)! These buttery Sprizt Cookies, made very easily with a cookie press, just debuted in our house yesterday in the shape of Christmas Trees and Stars. To take it up a notch on the “Christmas Festivity” scale, I decorated them with Christmas Sprinkles. Talk about a great Christmas cookie! And did I mention they’re soft and buttery and delicious?
This is the first time I’ve ever used a cookie press. I remember my mom using a cookie press growing up to make these cookies, but I had never tried the handy tool for myself. This particular recipe has been sitting in my collection for quite awhile, but I’ve avoided it because I was fully expecting the process to be a little more complicated than it was (I don’t know why). It ended up being super simple. If you’ve never used a cookie press before (I found mine at Target in the holiday section), you just load the dough, and hold the cookie press against your cookie sheet. Press the handle twice, and woo-la, you have perfectly shaped Spritz Cookies! I should note that it’s possible that not every cookie press will work the same, so you may want to read the instructions that came with your cookie press.
Anyhow, back to these lovely little cookies. My cookie press came with a dozen or so different disks to make a variety of shapes, so really, you could make these cookies any day of the year. I tend to only see them made right before Christmas, but they’re such a versatile cookie that they really could be enjoyed year-round. By versatile, you could use a variety of sprinkles for decoration, or you could go even further and add cocoa powder to the dough for a chocolate variety. Additionally, you could add food coloring to the dough so that the cookies are any color that you’d like! They’re impossible to mess up, which is another aspect I love about any recipe!
Lastly, a little personal side note. My dear Mom has been in the hospital for almost a week and has finally been moved from the Intensive Care Unit to a regular room. She’s still got quite a few issues going on, so I’ve been spending more time with her, and less time in the kitchen.
*Tip: Place your cookie sheets in the freezer for about 5-10 minutes before pressing the cookies onto it. It seems to help the cookie stick to the pan better. You do NOT need to chill the dough. If you’ve never used a cookie press and you need some tips on how to get the press to release the dough, checkout this video.This recipe makes 6-7 dozen cookies.
INGREDIENTS
- 1 cup sugar
- 1 1/2 cups butter
- 1 egg
- 2 tablespoons milk
- 1 teaspoon vanilla extract
- 1/2 teaspoon almond extract
- 3 1/2 cups flour
- 1 teaspoon baking powder
DIRECTIONS
- Pre-heat your oven to 350 degrees.
- With your mixer, beat together sugar and butter. When fluffy, add in egg, milk, vanilla extract and almond extract.
- In a medium sized bowl, sift together flour and baking powder.
- Slowly mix the dry ingredients into the wet and mix until well combined.
- Freeze your cookie sheets for about 5 minutes before pressing cookies.
- Fill cookie press with dough and begin pressing cookies onto cookie sheets. My cookie press requires two clicks for it to release the dough. Read the instructions for your cookie press, or view this video for help.
- Decorate the cookies any way you choose.
- Place in the oven for 10-12 minutes, or until the edges of the cookies start to brown a bit.
- Allow the cookies to cool on the cookie sheet for a few minutes, then use a spatula to transfer the cookies to a cooling rack.
Recipe from
Unsure- it’s been in my collection for a while.
